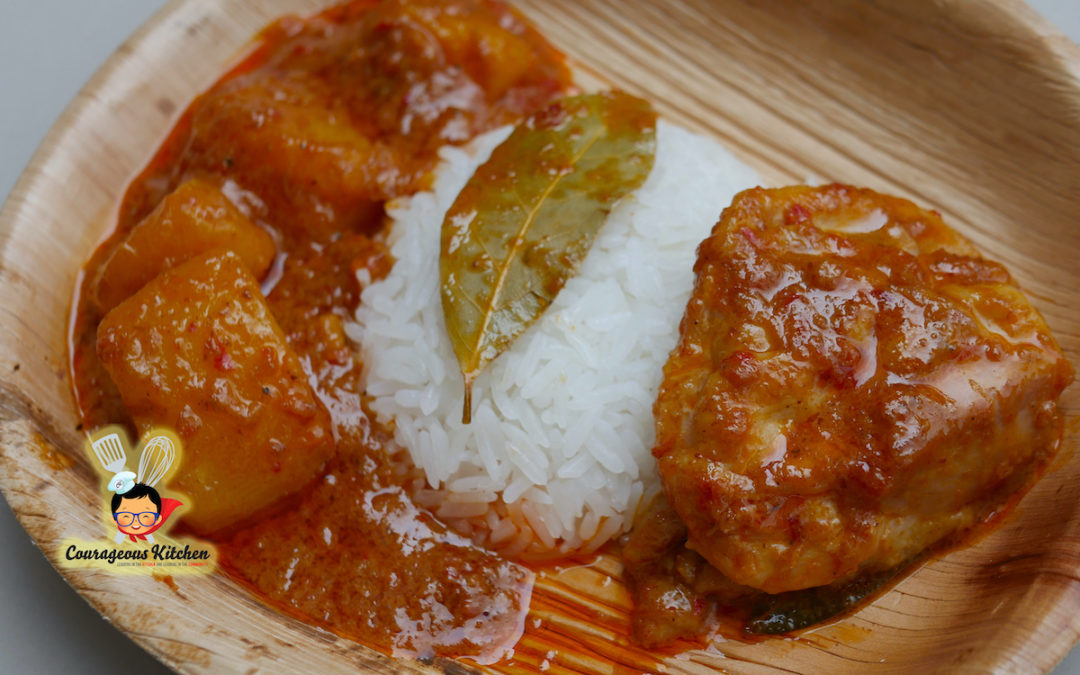
Today we’d like to present a tasty caveat in favor of annunciating EVERY consonant. We believe after cooking the massaman recipe below with chicken thighs, you too will be convinced that THIGH-land is the correct pronunciation. Let’s end this debate at the dinner table!
Thai Muslim food has a rich tradition that has been used to help popularize Thai curries all over the world. If you’ve heard the names of ‘massaman‘ or ‘khao soi‘ curries, they are great examples of this unique and too often overlooked subculture of Thai cuisine. Thai Muslim culinary heritage usually demands red meat stewed for long periods to become tender, fragrant, and extend the shelf life of the resulting curry. However, dark meat cuts of chicken make a great substitution in these curries and allow us to shorten the cooking time.
This recipe walks the line between full-flavored tradition and not spending hours in the kitchen. The key to saving time is getting ahead on your prep. This means adding the extra strep of blanching your potatoes, shortening the time it takes to cook them in your curry later.
Gathering all the ingredients to make your own massaman curry paste can be a daunting task!
Finding a great premade curry paste will also be a big step in saving you time. Making this delicious curry paste on your own is definitely worth it, but be prepared to add at least an hour of prep time. For example, when we’re teaching our guests to make massaman, we’ll make some paste the day before to be sure there’s plenty in case the timing is tight with our cooking classes.
May this recipe for massaman curry end all debates about Thigh-land! Be sure to check the FAQ below the recipe for answers to your most common questions as well.
Ingredients
Serves: 3-5 people
Equipment: pot or large wok with lid
Prep & Cooking Time: 1 hour
500g of chicken thighs, deboned 1 liter coconut milk 2 cups chicken stock 2 tbsp of massaman curry paste 5 tbsp cooking oil (we used coconut) 2 potatoes, peeled, parboiled and chopped into 4-5cm chunks 1/2 cup of roasted and ground unsalted peanuts (for garnish)
Finding a massaman curry paste you like or making your own is half the battle.
Seasoning (to taste) 3 tbsp of tamarind juice 3 tbsp of palm sugar 1 tsp of salt
Optional Dry Spices 2 bay leaves 4 green cardamom pods 1 cinnamon stick
Instructions
1) Start by blanching your peeled potatoes in boiling water for 3-4 minutes. 2) Add coconut oil to your wok over medium heat. 3) When your oil is hot, place your chicken thighs in the oil (4 tbsp), skin side down. 4) Allow the skin to become golden and crisp on the edges, then flip and repeat for the other side. 5) Remove the chicken, set aside, and add the remaining 1 tbsp of oil to your wok. Fry your curry paste until fragrant. When ready add 1 cup of coconut milk to keep your paste from burning.
Watch this brief clip of our massaman with chicken thighs bubbling in a hot wok!
6) Add potatoes, and chicken thighs. Then pour in your chicken stock and half of the remaining coconut milk. 7) Cover for 20 minutes, gradually adding more coconut milk to keep the curry from getting too dry. Remember to check the potatoes occasionally, using a fork to see if they have become soft. 8) When your vegetables are fork tender, season with tamarind, salt, and palm sugar to taste. 9) Stir in a few dry spices (optional) and turn off the heat. 10) Before serving, garnish with ground peanuts. (optional)
What is the origin of massaman curry?
The word massaman is an older Thai word meaning Muslim. The curry was brought to Thailand by Muslim traders from neighboring countries and solidified in Thai history when introduced to the Thai palace by Persian dignitaries. Modern versions have adapted to tone down the strength of the spices used, sweeten the dish, and shorten the cooking time. However, to find the most historically representative recipes, we should look to modern Thai Muslim communities in Thailand today.
Don’t forget to use roasted peanuts or spices to garnish your plates of massaman curry when finished.
What’s the most delicious massaman curry you’ve had?
The best massaman curry is the one that is slow-cooked. People often forget that this dish was created as more of a stew than the modern stir fry-esque curries that dominate Thai cuisine. When jumbo pots of massaman are allowed to simmer overnight, you awake to a smell that takes over the house and makes for some of the most memorable celebration meals in Thai muslim culture.
How should good massaman curry taste?
Good massaman curry is denoted by mature curry paste flavor and smell, and a rich bouquet of spices. The roasted curry and spice should be complimented by a light sourness. This is why you don’t get the same result using citrus juice to replace the tamarind in the recipe.
Most modern Thai recipes call for fish sauce and fermented shrimp paste. This is not required and the salty flavors should not dominate the taste of your curry paste. Sweetness as well as a hint of chili should be present in the dish but don’t worry, it’s not overwhelmingly spicy!
Frying the paste and the long stewing time means many of your soft aromatics like shallots, garlic, and lemongrass should have an opportunity to meld together. When you taste the finished curry, you should not be able to identify these individual aromatics in the flavor.
Why is my massaman dark brown?
Don’t be alarmed if your vibrant colored curry goes auburn brown by the time you’re ready to serve it. This is especially common with longer stewing times. As the coconut milk reduces (especially if you pot or wok is uncovered), and seasoning is added, the color deepens. Whatever the color, your massaman should be delicious!
Note the color may vary depending on the brand of curry paste you use as well. Find a massaman paste you like and you can use it in all sorts of ways. For example, add your extra paste to spice up your next crockpot roast, chili, or pulled pork dish. You can also turn raw jackfruit into vegan pulled pork sandwiches. The canned jackfruit you bought is likely from South Asia, so why not dress it up with those same flavors by adding massaman to your bbq sauce?
A dry wok or dark brown curry may be a sign you have over-reduced your massaman curry. Cover when cooking and be sure to have plenty of coconut milk to add, unless you prefer the dryer, rendang style massaman.
Why do you fry the chicken before making the massaman?
This is similar to the technique you see being used with steaks, where chefs will pan sear them before putting them in the over on other cooking method. In this case the chicken is poached in our curry which is great for slow cooking the chicken internally, but not so great for the outside texture. When you fry the skin you add a bit of texture and umami flavor, then borrow the fried bits on your pan back, deglazing our wok as we fry the curry paste in the same oil. Texture added and no flavor wasted!
Would you recommend chicken thighs for cooking khao soi as well?
Yes! If you want all the flavor that stewing can impart, avoid drier cuts of meat like chicken breast. In my opinion, squishy and rubbery chicken breast is one of the Thai food faux pas that separate average cooks from well-practiced enthusiasts.
Join Courageous Kitchen on team dark meat! Chicken thighs are a great way to upgrade so many Thai recipes, especially curries. This includes famous dishes like khao soi but can work well with your green and red curries as well.
Vegetarian massaman garnished with cinnamon, bay leaf, fresh curry leaves, and dehydrated rose.
What if I want to make a vegetarian massaman curry?
Go for it! Simply subtract the chicken thighs and sub in vegetable stock instead. You can double up on veggies to add some volume to your curry. This can vary depending on what you have access to, but we love adding pumpkin, sweet potato, and even butternut squash.
With the stress of cooking animal proteins out of the way, take the opportunity to pay extra attention to how your hearty vegetables cook. One common mistake with softer vegetables, like sweet potatoes for example, is the temptation to try and cook them the same amount of time. If you do, don’t be surprised when your curry starts to look like mashed potato mush!
We hope you enjoyed this brief history lesson on one of Thailand’s most beloved dishes. Don’t forget to share your recipe remakes on social media and follow us on Instagram for more updates!
Courageous Kitchen works to provide kitchen skills to youth in need, sponsor a class today!
We’re excited to share that our new veggie burger patties are now available for sale in Bangkok. The patties are the result of a lot of hard work and testing, as well as feedback from our healthy eating supporters. Consider them as a healthy and filling meal, that is also part of our efforts to encourage everyone to eat better and reduce food waste.
Our veggie patties have come a long way from the early versions we tested!
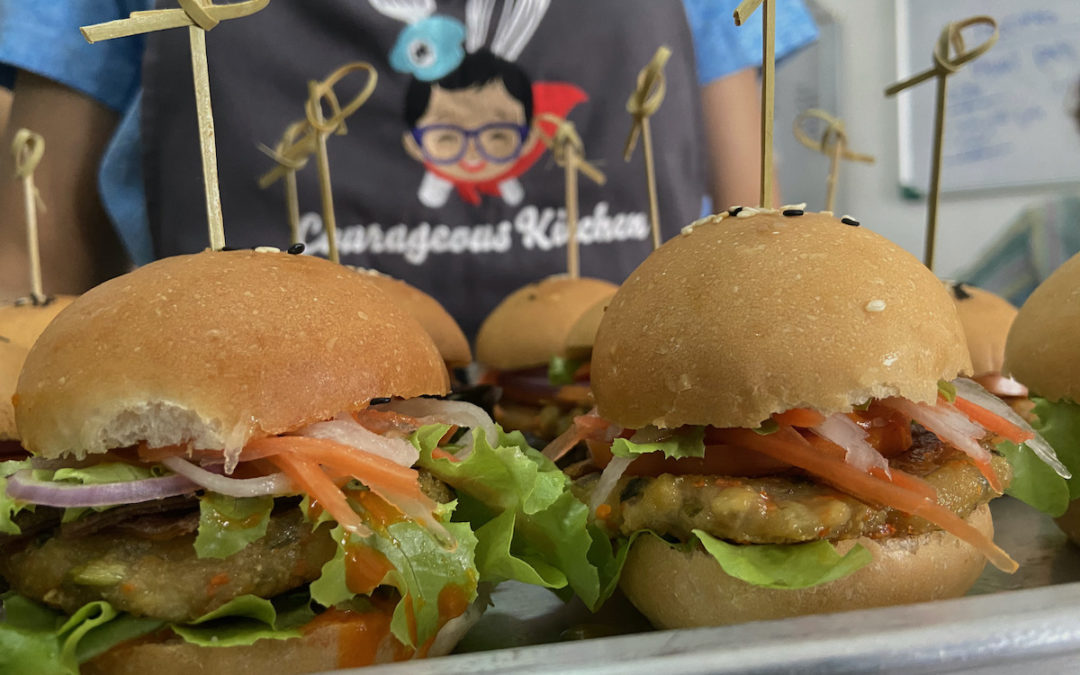
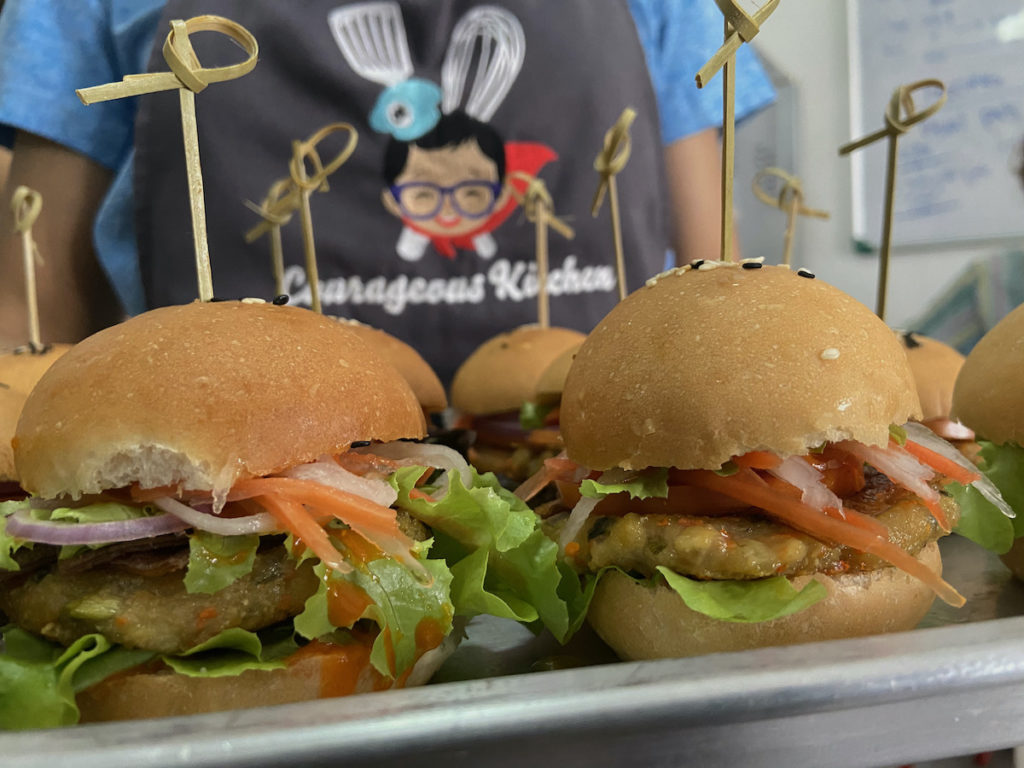
Veggie burger patties perfect for vegan, vegetarians, or anyone eating healthy.
The patties we’ve created aren’t like the ones you’re seeing swapped for beef at fast food restaurants. Instead of an imitation meat, they’re homemade patties created using a special blend of vegetables and herbs. The main ingredient for the burgers is okara, the leftover soy pulp from making tofu. We blend the pulp with mushroom, spring onion, and dried spices before hand making each patty.
Courageous Kitchen youth and volunteer chefs baking okara cookies together.
Before the pandemic hit, our tofu making class had been generating a buzz with healthy eating expats and visiting tourists in Bangkok. When the lockdown happened, although our classes had to stop, we continued making tofu at home and supplying a few local restaurants. To make tofu you need to squeeze the moisture out of the soybeans, leaving the fibrous part of the bean behind. While it may seem like a worthless byproduct bound for the trashcan, okara still has plenty of nutritional value.
To avoid food waste, we’ve been experimenting with using the leftover okara in different recipes. We’ve made a variety of spreads, pastes, and even cookies. However, the most popular of our creations have been the veggie burger patties. The soy pulp allows them to be dense and pliable, while still being soft on the palate and enjoyable to eat. That’s not bad for a leftover food product that might seem worthless at first glance.
After a few months of testing, our veggie burgers are finally ready to arrive in buns around Bangkok.
You can buy your vegan and vegetarian burger patties through our partner Farmtastic. The company also carries our tofu and tempeh products, and a lot of other interesting food items. We hope to make them available in more places soon, and we appreciate your support while we navigate new sources of fundraising during this pandemic.
For more info on all of our current items for sale, find the full list on our new Food Products page.
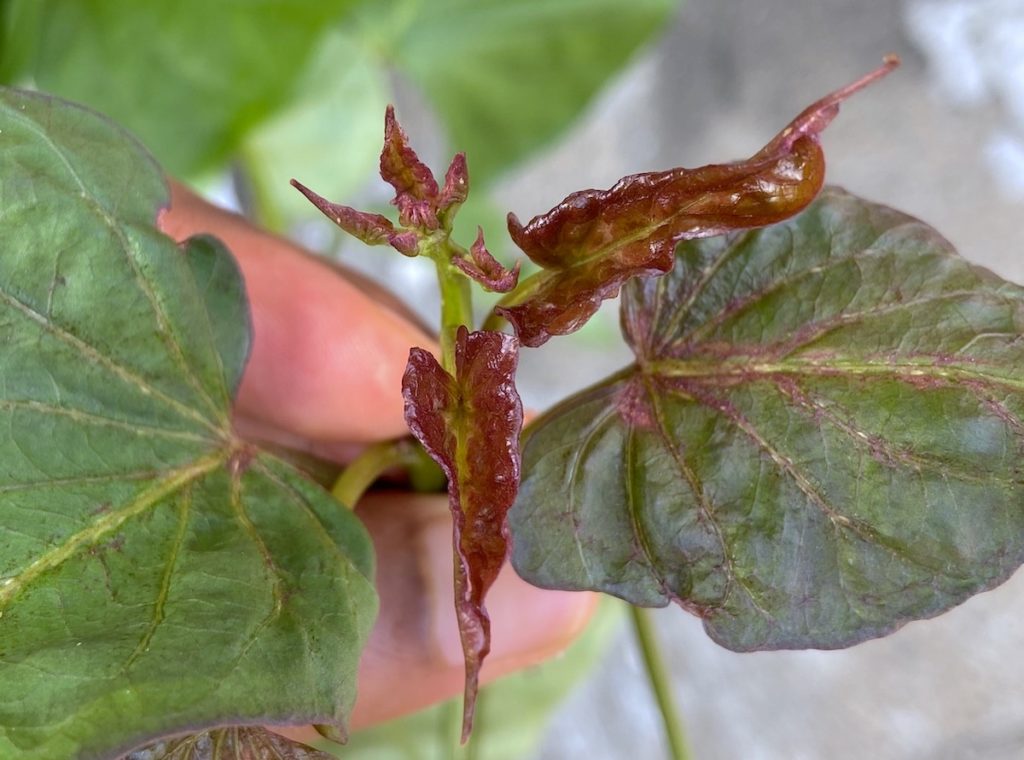
Often overlooked because of the delicious sweet potatoes themselves, the leaves of the sweet potato plant are nourishing as well. Sweet potatoes grow in the soil unseen, but above them is where all of the action is happening. Given enough space sweet potato vines are prolific. They will act as ground cover, stretching across your yard, and when given the opportunity to climb, will grab hold of nearby plants, posts, and fences. With plenty of sun provided, the heart shaped leaves stay ever stretching to find new opportunities to sun bathe.
Young sweet potato leaves on the end of a sprawling plant. The leaves are edible and have no bitter after taste.
Any gardeners reading are likely to join in our enthusiasm for these tasty leaves. The same can’t be said of regular potato leaves which can be toxic. Pumpkin, squash and other gourds have leafy vines, but the leaves have a sticky layer on them that needs to be peeled. Then there’s the incredibly popular cruciferous greens like kale which are well known, but sweet potato leaves are seldom as bitter, often being neutral tasting. This means they’re also good for introducing more green into the diet of young people as well.
A few ideas for cooking sweet potato include having them raw in a salad, or as an addition to a green smoothie. When harvesting them for a salad, look for the tender young leaves, often a deeper color than the larger leaves. For stews, stir frys, and any heavier cooking, the larger leaves hold up well. We use the beautiful new leaves as a colorful and tender garnish on top of other dishes as well. These leaves appear darker in color and more waxy looking, but lose this sheen as they grow larger.
Mix up your usual salad greens by adding sweet potato leaves. Here a young sweet potato stem anchors this salad (with the dark leaves), along with butterfly pea flowers and sesame seeds.
Often the young leaves are darker in color and more tender, making them a great for garnishing other dishes like this gaeng som curry with durian.
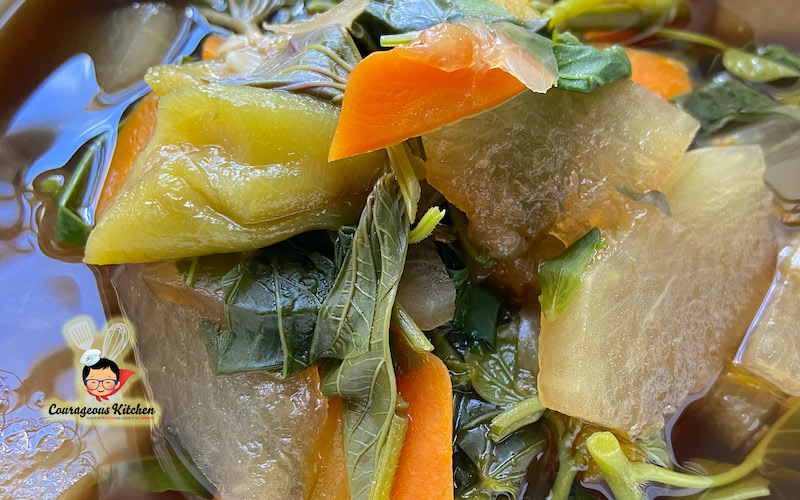
Today we want to share a bowl of simple, sweet potato soup. The recipe is versatile, allowing for lots of variations. Feel free to make it your own, using different vegetables and locally grown herbs if needed. The point is for the soup to be a vehicle for nutrition, and a champion for biodiversity. The flavor comes from the combination of soft and hard aromatics in the recipe, basil leaves and lemongrass, and should only be mildly sweet with an optional touch of heat from fresh chili. Enjoy the recipe below with a heap of sweet potato leaves, and any other nearby and nutritious ingredients you have to add.
Ingredients
Serves: 4-6 people
Equipment: mortar and pestle, pot
Prep & Cooking Time: 30 minutes
1L water or stock 500g sweet potato leaves 500g winter melon (substitute another soft gourd like zucchini if needed) 1 angled gourd, sliced 1 carrot, sliced 5 lemongrass stalks, smashed 6 shallots, smashed 4 coriander roots, smashed 3-4 fresh Thai chili (substitute with mild chili or bell pepper if desired) 1 tbsp of palm sugar 1 cup of soy sauce 1 tsp of salt 1 tsp of black soy sauce 1 bunch of lemon basil (or other sweet tasting herb leaf, like Italian basil)
The leaves on the sweet potato vine are dominant in the garden, and they’re tasty enough to be dominate your soup bowls too!
Instructions
1) Prep all your ingredients, washing and peeling as neccesary. Before you start cooking, consider which vegetables you’re adding that may need more time than others to cook. 2) Pound your shallots, coriander root, and lemongrass in a mortar and pestle. Or bruise with a heavy object. 3) Add water to your pot with these three aromatics (shallot, lemongrass, and coriander root) and bring to a boil. 4) When the soup is fragrant and lightly boiling, add any tough vegetables like carrot, followed later by soft veg like winter melon and angled gourd. Cook until soft. 5) Adjust your heat to low and season by adding your palm sugar, soy sauce, black soy sauce, and salt. Taste and adjust as needed. 6) Turn off the heat and add your fresh handful of lemon basil. 7) When serving remember to avoid adding lemongrass into your serving bowl. You can remove it completely, but leaving it in the soup will allow it to continue to add flavor to the broth.
The dominant flavors in this soup are the lemongrass and basil flavors, followed by a slight sweetness from the palm sugar and shallots.
This recipe is suitable for a large family of 5-6 people and may put a big dent in your garden. Don’t worry though, the sweet potato plants are resilient, and can survive your pruning and nibbling. Do let us know if you loved this recipe by donating to our charitable work, or signing up for one of our online classes. Then check back soon for more updates and recipes!
Are you familiar with turmeric milk, golden milk, or if you’re feeling fancy a ‘golden milk latte’? They may be popular at your local cafes and in the health food community, but they’re easy enough to make at home too. Whatever you prefer to call this special drink, let’s have a closer look at the ingredients and method for making your own healing cup.
The most prominent tradition of drinking turmeric infused milk comes from India. On the subcontinent a traditional ‘haldi doodh’ simply calls for warming milk with turmeric before serving. However, now that turmeric is becoming increasing popular outside the region, you’ll find popular versions mix in Indian spices like what you would find in a recipe for Chai, including: ginger, cloves, green cardamom and cinnamon. This makes the tea more fragrant and tasty, and possibly distracts newcomers to turmeric from the pungent, unfamiliar flavor. Turmeric aficionados however, can feel free to veer from the recipe, making your turmeric milk with as few or as many spices as you fancy.
But why do we call turmeric-infused milk, ‘golden milk’? No one seems sure, but we shouldn’t underestimate the possibility of the culinary world simply appropriating a common Indian drink and renaming it. If this is the case, whether the term originates as a clever marketing campaign, or an intentional attempt to obfuscate or mystify the origin of the milk tea, we should have strong reservations about what we call it. Keep this in mind if you’re deciding to add it to your menu.
Controversy aside, we should all be including turmeric more regularly in our diets, as recommended in the tradition of Ayurvedic medicine. Long before the hundreds of research studies commissioned in the past decades, traditional healers in India recognized the benefits of consuming this brightly colored root. Thanks to the volume of research the western world now also associates turmeric with a long list of health benefits including being a powerful blood cleansing, inflammation reducing, brain boosting, heart healing, and cancer resisting rhizome.
Turmeric is a great addition to your diet. Fortunately finding it fresh or in powdered form is becoming easier for people around the world.
For those not already very familiar with turmeric here are a few tips for maximizing the potential uses in your daily life:
1) Avoiding Yellow Hands & Utensils
One of the first things you’ll learn from using turmeric, especially the fresh version, is that the color is incredibly strong. While the skin on the root is usually a dull black, once gently scraped away, you will reveal the surprisingly deep orange color. Beware though, because this enchanting orange-yellow color can stain your hands, cutting boards, kitchen countertops, and anything else the root may come in contact with.
2) Understanding Powders and Supplements Pills
Outside of Asia, one of the most common ways to consume turmeric is as a powder or supplement. Be sure you have it from a reputable source, and understand whether you’re having dried turmeric powder, an extract like curcumin, or some variation. This is important to know as the potential benefits and use may vary. If you’re using these products to battle a specific illness, consider consulting your doctor about the appropriate dosage
3) Increasing Bioavailability
In addition to not being widely grown in many western countries, the other reason turmeric is often taken as a supplement is that turmeric may be less bio-available to your body in other forms. Bioavailability means your body can easily digest and put to work the most healing chemical components. Some foods require us to prepare them a certain way to make the nutrients in them more bioavailable. To improve the bioavailability of turmeric, for instance, prepare with healthy fats sources like coconut milk. This is because turmeric is more easily fat-soluble than water-soluble. Another tip is the use of black pepper, which can give the body more time to circulate and process the turmeric
If you think about how turmeric is typically consumed in places around Asia, we know local traditions have dictated this bioavailable method of consumption for hundreds of years. The best example can be found in many of the curries you love. Typically most any yellow colored curry you can think of, regardless of the nation of origin, is so colored because of the addition of turmeric. Those curry pastes contain many ingredients, but two not often excluded are coconut milk and black pepper. One of the tips in our green curry recipe calls for adding a small nob of turmeric to enhance the color, not to mention the health benefits!
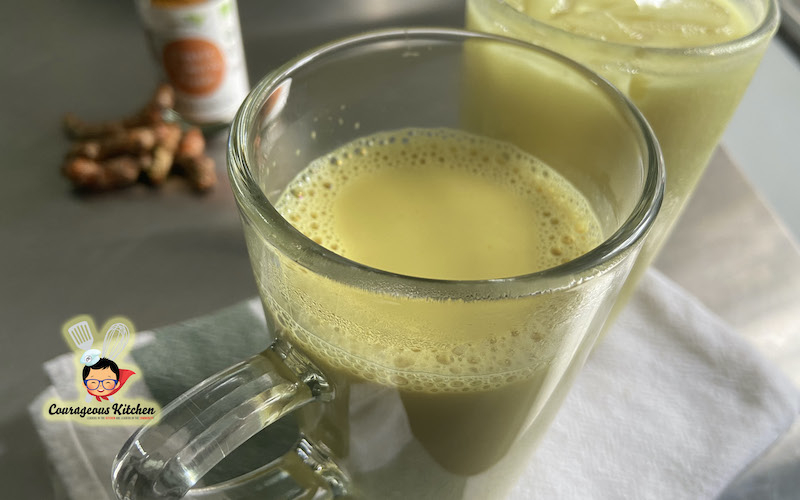
Turmeric Milk Recipe (Golden Milk)
Ingredients
2 cups of coconut milk (or the milk of your choice) 5g turmeric, smashed (or 1 tsp of turmeric powder) 5g of sliced ginger, smashed 2-3 black pepper pods 1-2 green cardamom pods, smashed and seeds removed 1 small cinnamon stick 1 tbsp of date syrup (or other natural sweetener)
Turmeric and ginger smashed in a traditional stone mortar and pestle.
Instructions
1) Smash any fresh or whole spices in a mortar and pestle, or with another heavy tool. This isn’t a pulverizing smash, but strong bruising that will allow the essential oils to come out more easily. 2) Add dry spices to a small pot over low heat. Briefly toast until fragrant. 3) Pour coconut milk (or the milk of choice) over spices and allow to simmer for 5 minutes. Don’t let your milk boil too vigorously. 4) Add your sweetener and stir. 5) Turn off heat and allow to cool for another 5 minutes or longer before serving. This gives the ingredients more time to steep into the milk. 6) Strain out your spices are you pour into a glass or mug. Serve hot, or over ice. 7) Garnish with a sprinkle of cinnamon on top if desired.
After you’ve gotten the hang of making turmeric milk, try adding it to your hot or iced coffee.
Tom Yum lovers will be excited to learn you can enjoy the popular soup in a variety of ways. One of our favorite renditions is in the form of fried rice. This is similar to what you would order at a street food stall with a wok station. If you can find fragrant herbs to add, this recipe will be a great way to spice up your usual homemade fried rice!
Aromatics & Cooking Method
If you’re new to tom yum, the flavors come from a combination of aromatic herbs popular in Thai cooking. Those herbs are lemongrass, galangal, and kaffir lime leaf. If you’ve ever had them in a Thai restaurant you may remember them because they’re the bits in the soup you can’t eat comfortably. Although all of them are edible, each is so coarse they would be really tough to chew.
To make the fried rice version, you’ll need to find your local asian grocer and prep the ingredients. Unlike the soup where the herbs will boil together, this recipe requires the elbow grease to pound them in a mortar and pestle. This is a big job, and is best done in a traditional stone mortar and pestle, so that each of the ingredients is properly smashed.
Homemade Thai chili jam is best (see our recipe), and you can use the excess oil for cooking your fried rice.
Can you put the items in a food processor or blender? Sure you can. However, often when we’re using the mortar and pestle, blending is not the most important function for using this traditional kitchen equipment. What we really desire are the essential oils from the ingredients that will make a paste that will remind your eyes, nose, and mouth of your favorite tom yum soup!
Finally, we should add some details about the moisture content of the fried rice. If you’re not cooking over high heat, or using leftover rice that is drier than rice freshly steamed, you may find the final product too soggy. If you know you prefer the drier, more crusty fried rice— be prepared with a heavy duty wok or pan to use. That way you can stir fry you rice longer, and scrape the stuck rice at the center of the wok to free the toastiest bits before they burn (not the best use of your non stick pan). Don’t be surprised to find cooks who love their fried rice this style, even throwing the wok or skillet of fried rice into the oven for a crispy finish.
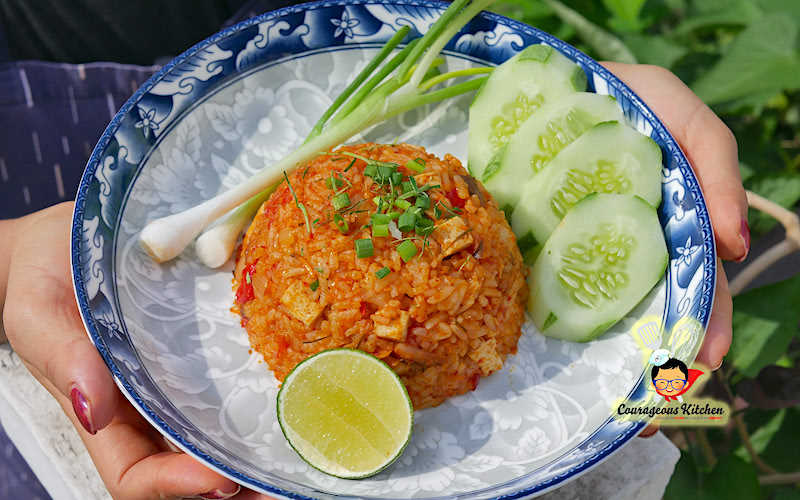
Tom Yum Fried Rice
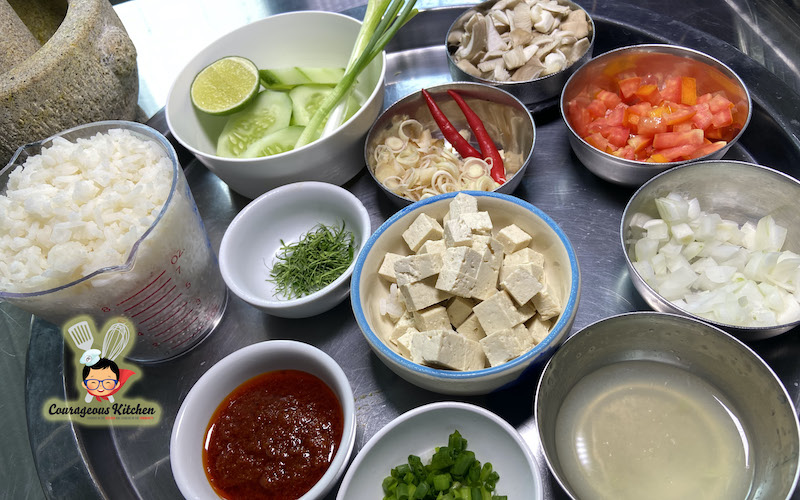
Gather, wash, and prep all of your Thai ingredients for this recipe, along with the protein of your choice.
Equipment: mortar and pestle (preferably stone), wok
Ingredients
1 cup of rice
70-100g of protein (we used tofu)
1 tbsp of oil
30g mushroom
30g tomato (plum or less watery tomatoes work better)
20g onion
2 kaffir lime leaves
2 tbsp of soy sauce
2 tbsp of sweet chili jam (nam prik pow)
Optional: Lime to squeeze on top and spring onion for garnish
Tom Yum Paste Ingredients:
1 tbsp of minced galangal
1 tbsp of thin sliced lemongrass
2 chili (optional)
Directions
Prep all your ingredients. In mortar and pestle, pound lemongrass, galangal and chili together. Set aside.
Chop your proteins bite sized or smaller.
In a wok over medium heat, add a tbsp of cooking oil.
Add your proteins (If using tender meats like shrimp, you can set aside after cooking) and stir until mostly cooked.
Then add your paste and allow to become aromatic. Followed closely by your onions.
When your proteins are cooked and other ingredients smell nice, add your mushrooms and tomato.
Now you’re ready to add your rice. Mix with everything and add soy sauce and chili paste.
Stir fry until ingredients are well incorporated, or you have achieved the desired texture (give it an extra few minutes if you prefer a dry fried rice).
Plate and garnish, reminding your guests to squeeze their lime wedge over the top before enjoying.
The combination of classic Thai aromatics makes this a spicy choice no matter what meat, seafood, or plant based alternative you choose for your recipe.